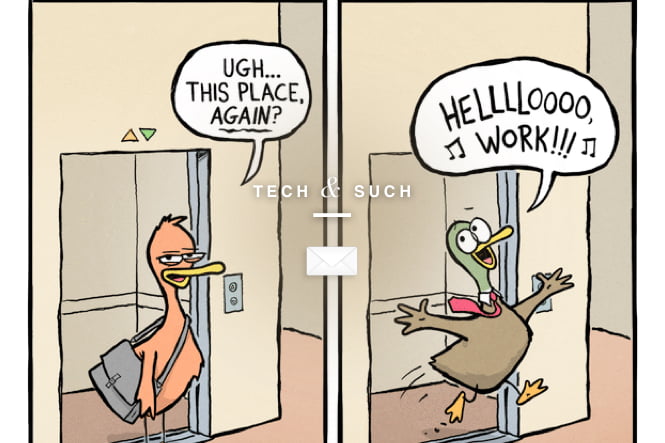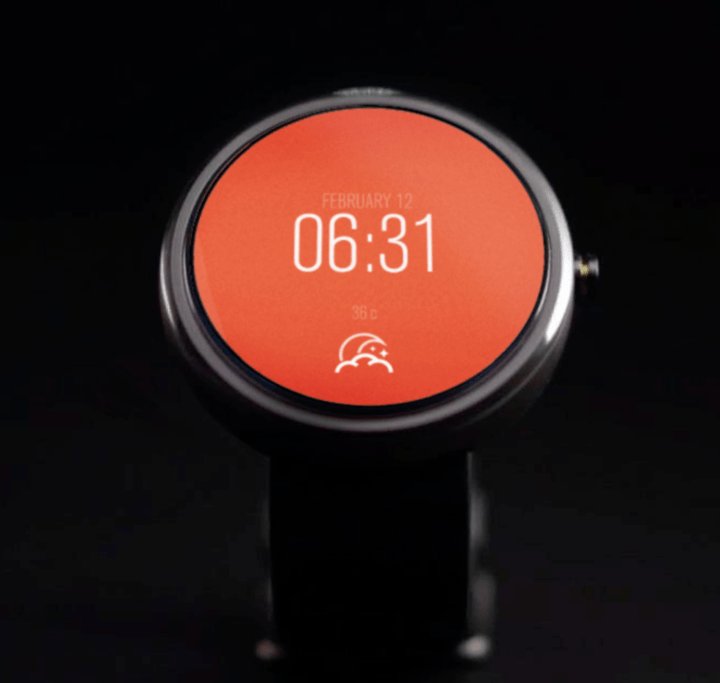
Wearable devices such as Android wear and the upcoming Apple watch are pioneering a brand new user experience, “Information at a glance”.This presents new opportunities for app developers to provide end-users with contextual, relevant and personalized information. However, it also introduces a whole new set of challenges for both designers and developers.In this tutorial we explore these challenges by building an Android wear watch face with real-time weather data (Figure 1). This tutorial is separated into four parts:
- 1 – Overview & Drawing a watch face (Current)
- 2 – The Watch Interface
- 3 – Real-time weather communication
- 4 – Packaging and publishing the watch face
Before we get started, you can download the watch face from the Google Play Store or explore the source code on Github.
The Watch face
The watch face is our primary user interface. It provides contextual user information like time, date, weather & temperature “at a glance”. Furthermore, the watch face must also cater for system notifications, status icons and provide support for ambient mode that preserves battery life. We explore these in Part 2 -The Watch Interface.
The Weather data
We use the Open Weather Map API to retrieve the real-time weather at the user’s location. The API is great as it includes information such as sunrise, sunset, temperature and weather info to facilitate display of weather icons.
The Phone
The watch face cannot connect to the internet on it’s own, it must pair with a device to send or receive data. In our example, we create an android service for the overall watch face app. This service connects to the the Open Weather Map API to get the latest weather information. It then notifies the watch and provides it with the data needed to render the watch face. We explore these details in Part 3 – Real-time weather communication.
Data communication with android wear
Getting ready for development
Pair your wearable and phone.
Tip: Use a physical Android phone or tablet device
The Google Play Services API is required to communicate with an android watch face. It’s much easier and faster to use a physical device than to set it up on a phone emulator. Note: you can still use the emulator for the watch face if you wish.
Step 1: Install the Android Wear app on your mobile device.Step 2: Launch the Android Wear app and use it to connect your phone to a wearable or to an emulator.If you want to connect an emulator, click Connect Emulator. On the other hand, if you’re connecting to an actual wearable, click “Pair with a new wearable” (Figure 2).
Figure 2: Pair a wearable via the Android Wear app
Step 3: (Emulator only) If you’re having issues is connecting to the wear emulator, you may need to open a tcp channel on your device.When we wrote this tutorial, we needed to this manually. If you see “Connecting…” in the Android Wear app for a long time, but nothing actually happens (Figure 3), you will need to follow this step.
Figure 3: Waiting connecting an emulator
Open CMD on Windows or Terminal on Mac, and switch to the Android SDK/Platform Tools folder (my path on mac is ~/Library/Android/sdk/platform-tools). Then execute the following command.
adb -d forward tcp:5601 tcp:5601
See here for more details on the adb command.
Enable Developer Options on your watch and phone
To test on a physical wearable device or phone during development, developer options for the device must be enabled. We’ll cover this flow for a wearable device, it’s essentially the same flow for enabling android devices for debugging:
Enable Developer settings on the Android Watch
Step 1: On a physical wearable device go to Settings -> About page. 2: Tap “Build number” seven times (Figure 4) until you can see a toast message which says you are a developer.At this point, a new entry called “Developer Options” should be added on the bottom of settings page (Figure 5). 3: Enabled ADB Debugging (Figure 6).ADB debugging is needed for debugging, logging and deploying packages make sure to enable it!
4: The about page on an Android wear.
5: The developer options on the setting page.
6: ADB debugging option
Java, Android and IDE installation
In order to start developing, you will need familiarity with the Java language, Android and have Android Studio installed on your machine.
If you are new to Java, checkout this tutorial, for Android, checkout this tutorial.If you don’t have Android Studio yet, see here for installation instructions.
Install Android 5.0.1 SDK or higher
Next, you need to install the Android SDK. Be sure to install Android 5.0.1 SDK (API 21) or higher because classes needed for watch faces are only introduced in this version.To install the android SDK. Launch Android Studio and then open the SDK Manager (Menu > Tools > Android > SDK Manager), and ensure “Android 5.0.1 (API 21)”->”SDK Platform” is checked. To use the Android Wear emulators, you can also install the Android Wear Intel x86 Atom System Image (Figure 7).
Figure 7: Install packages & emulator for Android wear
Drawing the watch face
Create a new project for your mobile and wearable apps
The first step of making a watch face is to create a new project. We can use a template that Android Studio provides for this. The project template contains the basic environment for building a wearable app such as the gradle build files and project dependencies.Step 1: Open Android Studio and choose create a new Android Studio project (Figure 8).
Figure 8: Create a new Android Studio project.
Step 2: Enter project information such as the app name, company domain and the project location.Step 3: Choose Phone and Tablet where the “Minimum SDK” must be API 18 or higher and Wear where the “Minimum SDK” must be API 21 or higher. (Figure 9)
Figure 9: Choose apps for building Watch Faces
Step 4: In our example, an activity is not needed for either app. Click the Finish button and Android Studio will create the project.
TIP: We need to create a phone & tablet app even if data connections are not required for the wearable app. This is because the wearable app must be embedded inside a phone/tablet app for deployment to the Play Store. We will cover this in Part 4 – Packaging and publishing the watch face
Create a WatchFaceService
WatchFaceService is the base class for Android watch faces. There are two types of WatchFaceService that can be extended to provide a custom watch face:CanvasWatchFaceService which provides a Canvas to draw a watch face.Gles2WatchFaceService which supports OpenGL ES 2.0 features to render a 3D watch face.In the tutorial, we focus on CanvasWatchFaceService as it meet the needs for our app.Step 1: Create a new class named WeatherWatchFaceService that extends a CanvasWatchFaceService in the wear module. (Figure 10)
Figure 10: Create WeatherWatchFaceService.java
TIP:
A wearable app can include more than one watch face, so you don’t need to create different apps for different watch faces.
Step 2: Add a subclass which extends CanvasWatchFaceService.Engine.
public class WeatherWatchFaceService extends CanvasWatchFaceService {
    @Override
    public Engine onCreateEngine() {
        return new Engine();
    }
    private class Engine extends CanvasWatchFaceService.Engine {
}}
Step 3: Override onDraw and use the canvas to draw the current time on the center of the screen.
private class Engine extends CanvasWatchFaceService.Engine {
    Paint mTextPaint;
    Float mTextXOffset;
    Float mTextYOffset;
    @Override    public void onCreate(SurfaceHolder holder) {
        super.onCreate(holder);        // Create the Paint for later use
        mTextPaint = new Paint();
        mTextPaint.setTextSize(40);
        mTextPaint.setColor(Color.WHITE);
        mTextPaint.setAntiAlias(true);
        // In order to make text in the center, we need adjust its position
        mTextXOffset = mTextPaint.measureText("12:00") / 2;
        mTextYOffset = (mTextPaint.ascent() + mTextPaint.descent()) / 2;
    }
@Override    public void onDraw(Canvas canvas, Rect bounds) {
        canvas.drawText("12:00",
                bounds.centerX() - mTextXOffset,
                bounds.centerY() - mTextYOffset,
                mTextPaint);
    }}
Figure 11 explains why we need to use Paint.ascent() and Paint.decent() to calculate the width and height of the time display. We can then adjust it’s starting position (in canvas.drawText) to center the time on the screen.
Figure 11: Font Metrics (Source)
TIP: Create objects such as the Paint object only once (in the onCreate method) instead if doing it every time onDraw. This reduce the performance overhead of creating and destroying objects in each invocation of the onDraw method.
Configure AndroidManifest.xml
If you have developed an Android app, you may already be familiar with the AndroidManifest.xml. It contains details such as the app name, version, permissions, default activity, services etc. The mechanism is similar for wearable apps. The following steps will add the necessary settings for this watch face.Step 1: Add a watch_face.xml in xml folder (Figure 12).
<?xml version="1.0" encoding="UTF-8"?>
<wallpaper xmlns:android="http://schemas.android.com/apk/res/android" />
For watch faces we have to add this xml and configure it in AndroidManifest.xmlStep 2: Add preview images in drawable folder (Figure 12).You also need to create preview images for the square and round faces. You can download our preview images to get started.
Figure 12: Add watch face resources.
Step 3: Configure AndroidManifest.xmlAdd a service element as shown in the example below, which includes all the necessary configuration for a watch face service.
<?xml version="1.0" encoding="utf-8"?>
<manifest xmlns:android="http://schemas.android.com/apk/res/android"
    package="com.mycomany.mywatchface" >
<uses-feature android:name="android.hardware.type.watch" />
<uses-permission
android:name="com.google.android.permission.PROVIDE_BACKGROUND" />
<uses-permission android:name="android.permission.WAKE_LOCK" />
<application  android:allowBackup="true"
android:icon="@drawable/ic_launcher" android:label="@string/app_name"
android:theme="@android:style/Theme.DeviceDefault" >
<service android:name=".WeatherWatchFaceService" android:label="Weather"
android:allowEmbedded="true"
android:permission="android.permission.BIND_WALLPAPER" >
<meta-data  android:name="android.service.wallpaper"
android:resource="@xml/watch_face" />
<meta-data  android:name="com.google.android.wearable.watchface.preview"
android:resource="@drawable/preview" />
<meta-data
android:name="com.google.android.wearable.watchface.preview_circular"
android:resource="@drawable/preview_circular" />
<intent-filter>
<action android:name="android.service.wallpaper.WallpaperService" />
<category
android:name="com.google.android.wearable.watchface.category.WATCH_FACE" />
</intent-filter>
</service>
</application>
</manifest>
We have now created a basic watch face app, next we will explain how to run it.
Part 3: Run the App on a Wearable Emulator
In the following section, we will explain how to create a wearable emulator and run a watch face app on it.
Step 1: Open AVD Manager(Android Virtual Device)There are two ways to open AVD Manager:
- Menu > Tools > Android > AVD Manager
- Click AVD Manager button on Toolbar (Figure 13)
Figure 13: AVD Manager button
Step 2: Create an wearable emulator on AVD ManagerClick “Create Virtual Device” button. Then you can choose either Round or Square. In the example, we choose Round first. Then follow the instructions to finish the creation.
Figure 14: Create a wearable emulator
Step 3: Launch the AVD you just createdStep 4: Run the wear moduleClick run button to run the wear module(Figure 15). Android Studio will show up a Edit configuration dialog (Figure 16). For the watch face we don’t have a default Activity however, the Run command defaults to “Launch default Activity”. Simply select “Do not launch Activity” setting and click “Run” button (Figure 16).
Figure 15: Run button
Figure 16: Edit Configuration
If everything went as planned, you’ll see Success message on “Run” window(Figure 17).
Figure 17: Success message on “Run” window
Step 5: Change to the watch face.On the watch, there are two ways to change the current watch face.
- Short tap on the home screen > Settings > Roll to the bottom and tap “Change Watch face”
- Long tap on the home screen.
After open the setting page, select the watch face we just created (Figure 18).
Figure 18:
Choose the watch face.
Thats it! Our watch face is now running. Sure, it’s still basic, but we’ll cover the more advanced aspects in upcoming posts
- Part 2 – System UI requirements for the watch face
- 3 – Real-time weather communication
- 4 – Packaging and publishing the watch face
We look forward to your thoughts, comments and question. Please do not hesitate to reach out via the comments section below.
Continue on to Part 2 of the tutorial here.